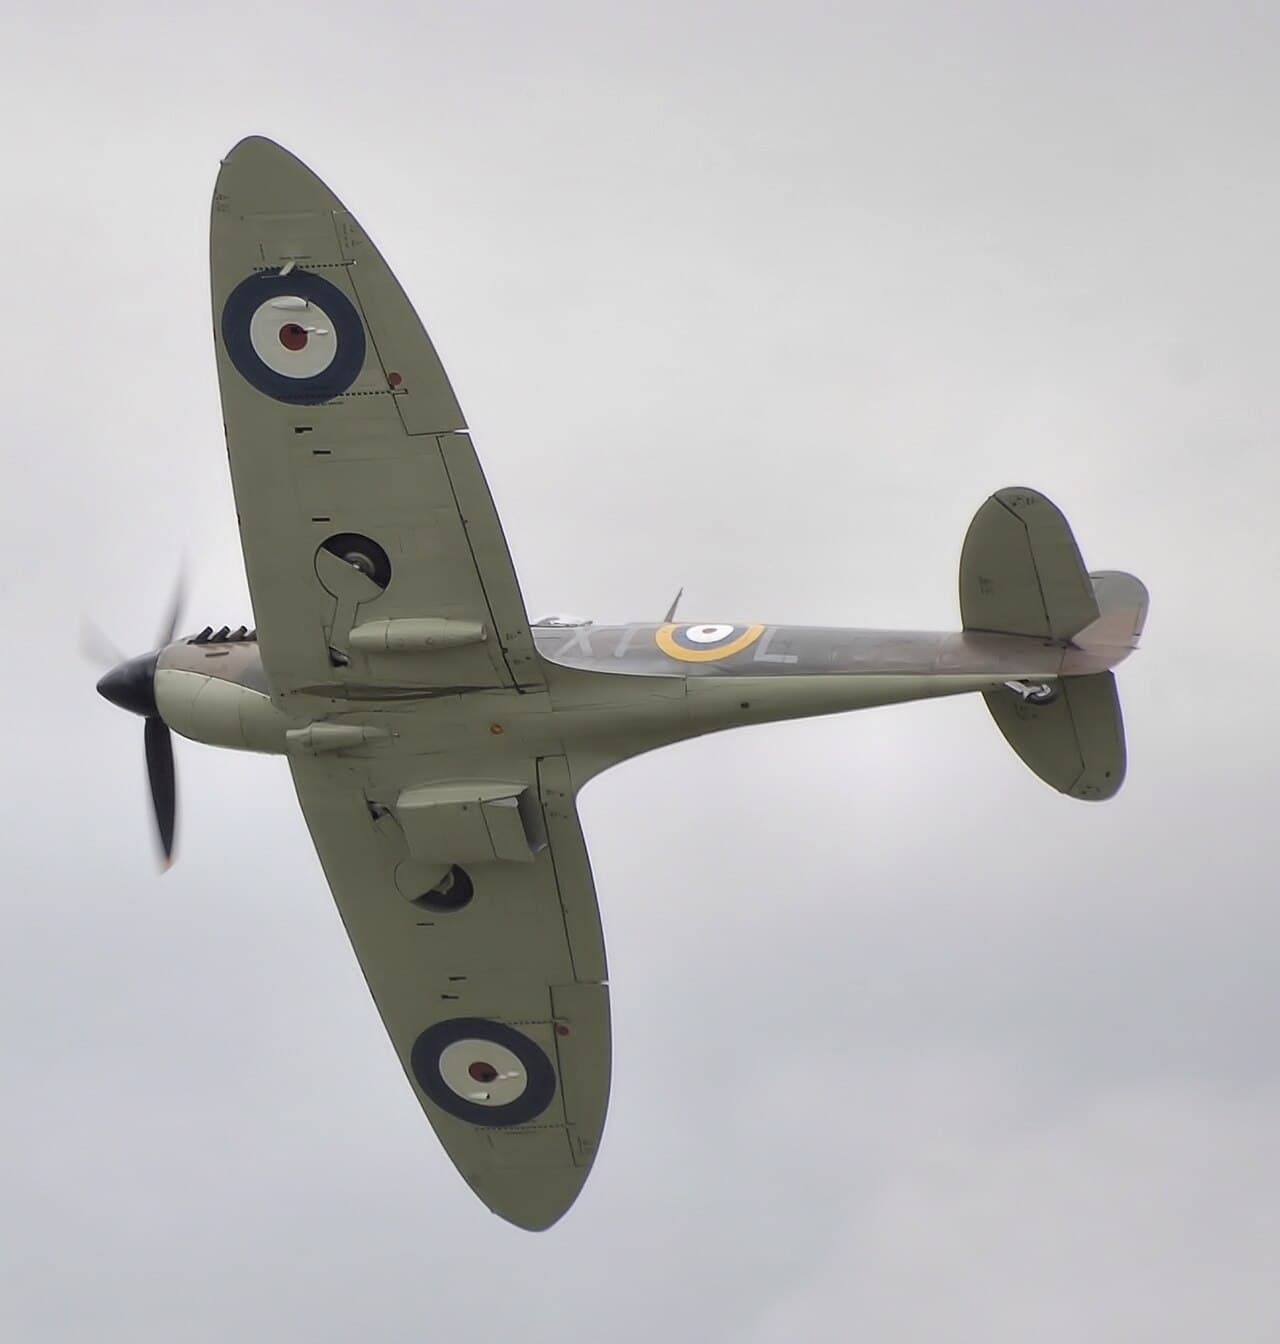
Spitfire Mk IX vs Fw 190A
The stopgap marvel versus the Butcher Bird, the Channel Front's defining rivalry
The Bottom Line
The Spitfire Mk IX was the better pure air superiority fighter at typical combat altitudes. The Fw 190A was the more versatile, survivable, and heavily armed platform. Their rivalry was so closely matched that strategic factors, numbers, training, fuel, mattered more than any performance differential.
Who Wins Each Scenario?
High-altitude interception above 22,000 ft
Spitfire Mk IX
The Fw 190A's performance collapsed above 22,000 ft while the Merlin's two-stage supercharger kept the Spitfire IX competitive to 30,000 ft and beyond. At these altitudes, the Spitfire was faster, climbed better, and turned tighter by decisive margins.
Medium-altitude dogfight (15,000–20,000 ft)
Spitfire Mk IX
The Spitfire IX held advantages in speed, climb, and turning at typical combat altitudes. The AFDU trials confirmed the Spitfire "compared favourably" here, with Alan Deere noting 30 mph faster and "vastly more manoeuvrable."
Low-level fighter-bomber operations
Fw 190A
The Fw 190A was faster at sea level, carried heavier bomb loads, had more strafing firepower, and its rugged airframe better absorbed ground fire. Its wide undercarriage handled rough forward airfields that would have damaged the Spitfire.
Bomber interception
Fw 190A
Four 20mm cannons gave the Fw 190A nearly twice the firepower of the Spitfire IX, critical when engaging heavy bombers that required concentrated hits to bring down. The Fw 190's armor also better protected against bomber defensive fire.
Energy fighting (boom-and-zoom)
Fw 190A
The Fw 190A's superior dive speed, roll rate, and low-altitude acceleration made it more effective in slash-and-run attacks. Spitfire pilots were trained never to follow an Fw 190 into a dive, the performance gap was too large.
Sustained turning engagement
Spitfire Mk IX
The Spitfire's tighter turning circle was absolute, it could always get inside the Fw 190 in a sustained turn. Fw 190 pilots who allowed themselves to be drawn into a turning fight against a Spitfire were making a tactical error.
Interactive 3D Models
Performance Profile
Overall capability comparison across six combat dimensions
Head-to-Head Specifications
Key performance metrics compared side by side
Size Comparison
Both aircraft drawn to the same scale, the Spitfire Mk IX has 2.4ft greater wingspan and is 2.0ft longer
Performance Analysis
How each aircraft performs across key combat dimensions
Speed
WINNER: Spitfire Mk IX5–7 mph faster above 15,000 ft; 30 mph advantage at optimum altitude (21,000 ft) with Merlin 66
7–8 mph faster at sea level; slight advantage below 5,000 ft
The Spitfire IX's two-stage Merlin gave it a decisive speed advantage at the altitudes where most combat occurred. The Fw 190A was faster at the deck, but few engagements began there.
Climb Rate
WINNER: Spitfire Mk IXSuperior rate of climb at all altitudes above 5,000 ft; approximately 4,530 ft/min vs 3,350 ft/min
Better initial acceleration in a zoom climb from high speed
The Spitfire IX could gain altitude faster in a sustained climb, a crucial advantage for regaining energy in a dogfight. The Fw 190A's zoom climb was excellent but could not be sustained.
Maneuverability
WINNER: Spitfire Mk IXTighter turning circle at all speeds; could get inside the Fw 190 for deflection shots
Superior roll rate, one of the best of any WW2 fighter; could snap-roll into evasive maneuvers the Spitfire couldn't follow
Different kinds of agility. The Spitfire turned better; the Fw 190 rolled better. In a turning fight the Spitfire won; in a rolling scissors or snap deflection the Fw 190 won. Experienced pilots on both sides knew which type of fight to pursue.
Altitude Performance
WINNER: Spitfire Mk IXDecisive advantage above 22,000 ft where the Merlin's two-stage supercharger maintained full power; dominant above 27,000 ft
Better at very low altitudes (sea level to 3,000 ft) where the BMW 801's low-altitude power output was strong
The Fw 190A's performance fell away rapidly above 22,000 feet, its single-stage supercharged BMW 801 simply could not compete with the Merlin 61's two-stage system. This was the Spitfire IX's most decisive advantage.
Range & Endurance
WINNER: Fw 190ANone, the Spitfire's 85-gallon internal fuel gave it a combat radius of only about 90 miles
Approximately 115 gallons internal fuel; range of ~500 miles vs the Spitfire's ~434 miles
Both aircraft had inadequate range for deep escort (the P-51 Mustang eclipsed both), but the Fw 190A had meaningfully better endurance. The Spitfire's Merlin consumed approximately 150 gallons per hour at maximum power.
Dive Speed
WINNER: Fw 190AControls remained effective at high speed; good recovery characteristics
Superior initial dive acceleration and higher terminal dive speed; better energy retention in the pullout
The Fw 190A could extend away in a dive that the Spitfire IX could not match. RAF pilots were trained never to follow an Fw 190 into a steep dive, the performance gap was too significant.
Roll Rate
WINNER: Fw 190ANone, the Spitfire's ailerons stiffened significantly at high speed
Far superior roll rate at all speeds; could reverse direction faster than almost any contemporary fighter
The Fw 190A's roll rate was its signature advantage and the key to its defensive flying. A skilled Fw 190 pilot could use snap rolls and rapid reversals to defeat tracking solutions that the Spitfire's slower roll could not follow.
Cockpit Visibility
WINNER: Fw 190AGood visibility, especially with the later bubble canopy; excellent forward view during approach
Excellent all-round visibility from the high-set cockpit; wide-opening canopy for easy egress
Both aircraft offered good pilot visibility. The Fw 190A's cockpit sat higher on the fuselage, giving slightly better rearward visibility. The Spitfire IX's visibility improved markedly with the introduction of the cut-down rear fuselage and bubble canopy on late-production aircraft.
Photo Gallery, 12 Photos
Click any photo to enlarge · 12 photos
Historical Context
The strategic backdrop that shaped both aircraft
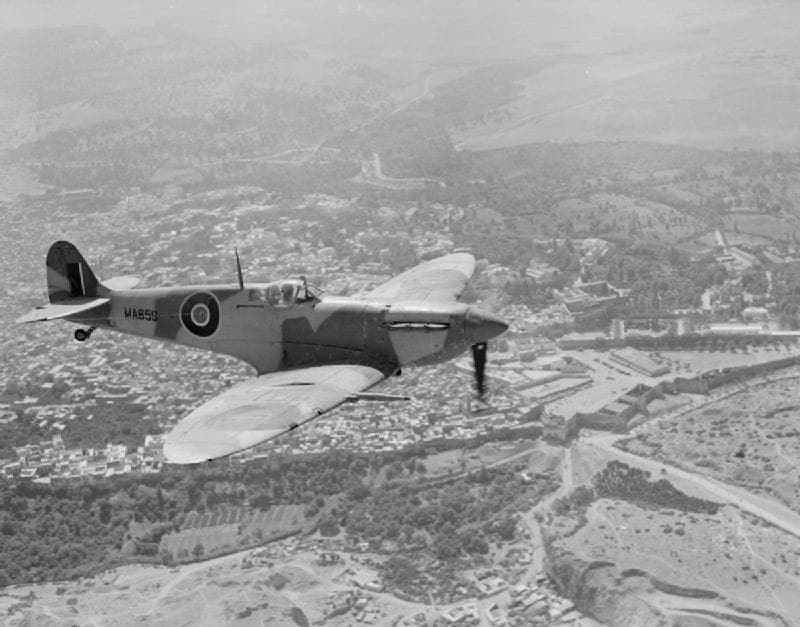
The story of the Spitfire Mk IX begins with a crisis. When the Focke-Wulf Fw 190A appeared over the English Channel in August 1941, RAF Fighter Command found itself in an unfamiliar and deeply alarming position: its front-line fighter, the Spitfire Mk V, was comprehensively outclassed. For months, Allied intelligence didn't even know what the new German fighter was, pilot reports of a "radial-engine fighter" were initially attributed to captured Curtiss P-36 Mohawks.
The reality was far worse than a mystery. The Fw 190A was 25–35 mph faster than the Spitfire V at all altitudes. It could out-dive, out-roll, and out-climb the British fighter. Only in the sustained turning circle did the Spitfire retain an advantage, and as Wing Commander Johnnie Johnson later wrote, "you couldn't turn all day." The depth of RAF penetrations over occupied France decreased steadily as Fw 190 numbers grew. The Butcher Bird was driving Fighter Command back to the coast.
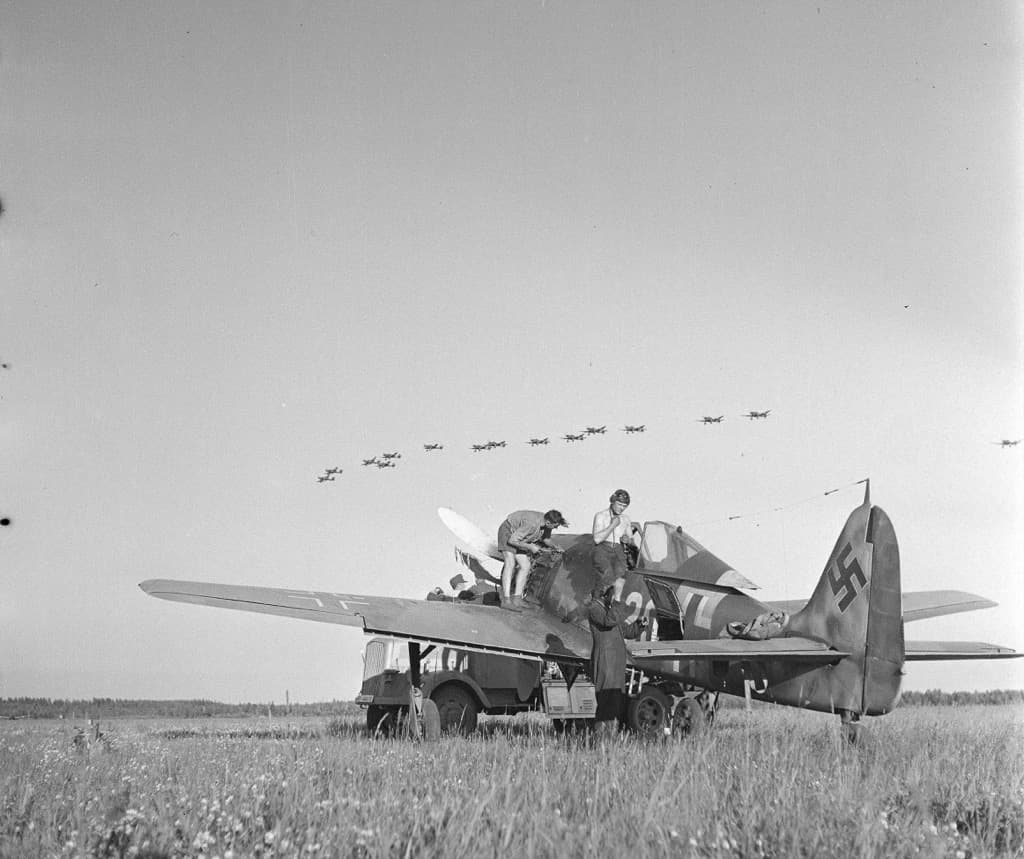
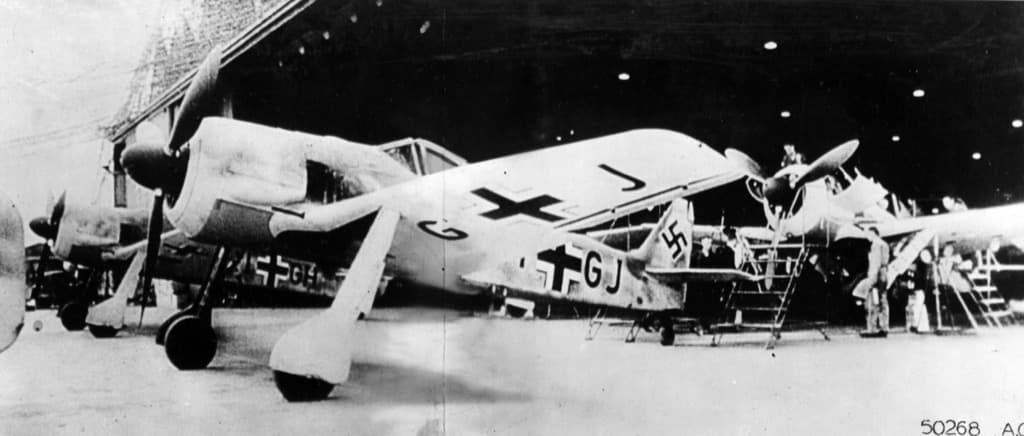
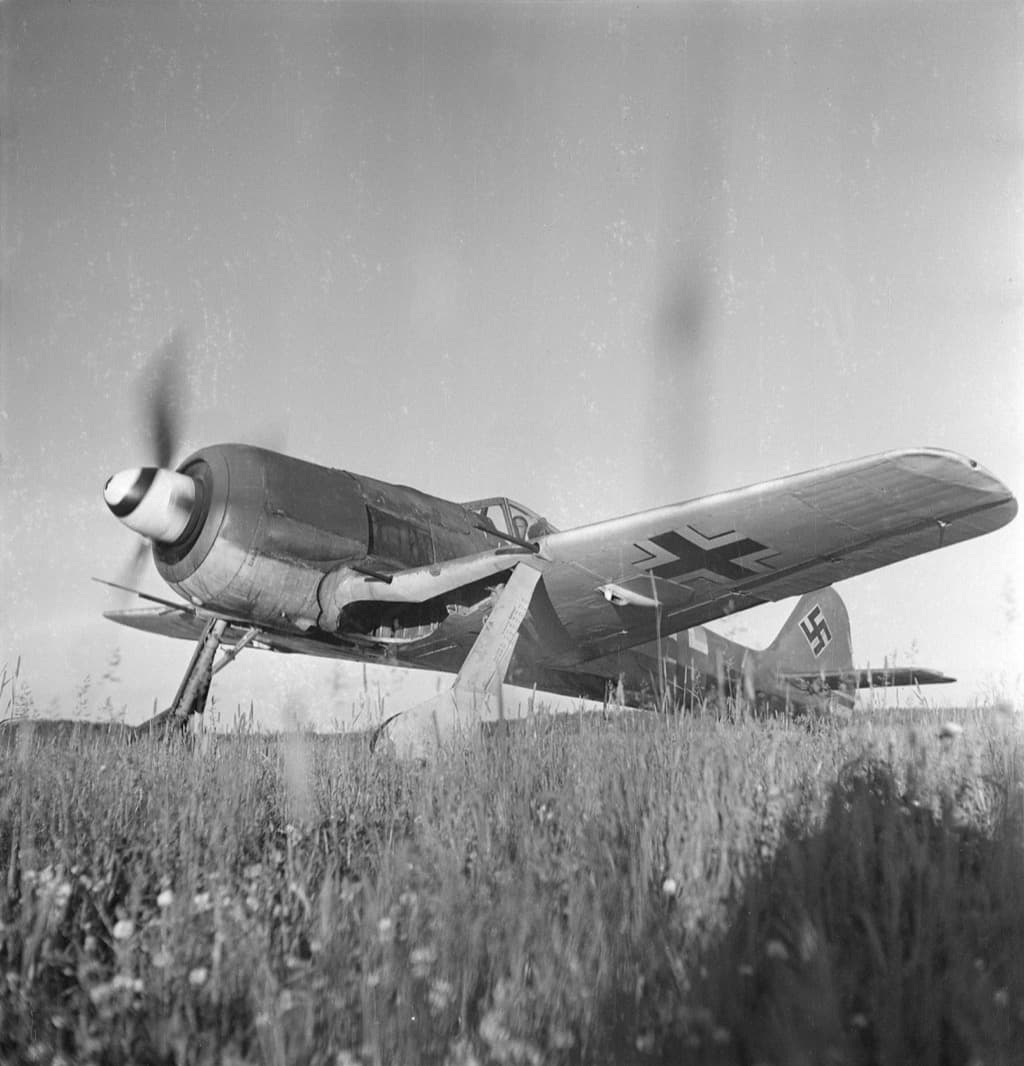
Kurt Tank had designed the Fw 190 with a philosophy that directly challenged the approach of both the Bf 109 and the Spitfire. Where those aircraft were "a very large engine on the front of the smallest possible airframe," as Tank himself described them, the Fw 190 was built as a "Dienstpferd", a cavalry horse rather than a racehorse. It was designed to operate from rough airfields, be maintained by minimally trained ground crews, and absorb battle damage that would have destroyed more delicate fighters.
The British response came with unexpected speed. The Rolls-Royce Merlin 61, fitted with a two-stage, two-speed supercharger producing 1,565 horsepower, was mated to a modified Spitfire Mk V airframe to create the Mk IX. This was explicitly a stopgap, the purpose-built Mk VIII, with a redesigned airframe optimized for the new engine, was still months from production. But the threat was immediate, and the Mk IX was available now.
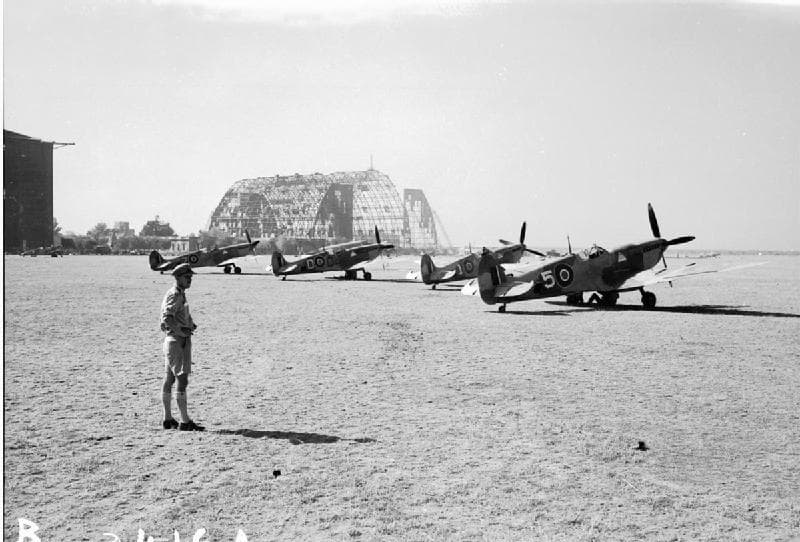
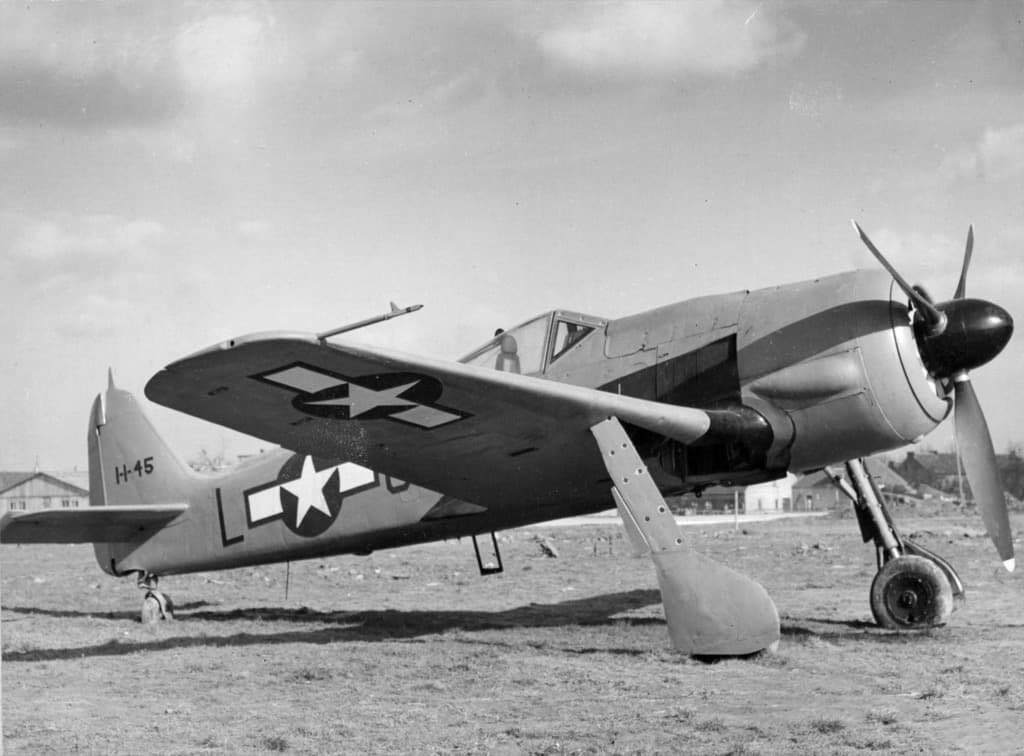
The first Spitfire IXs reached No. 64 Squadron at Hornchurch in June 1942. Within weeks, the balance of the Channel air war had shifted. A critical intelligence windfall came on 23 June 1942, when Oberleutnant Armin Faber of JG 2 mistakenly landed his Fw 190A-3 at RAF Pembrey, giving the British their first intact specimen for evaluation. The Air Fighting Development Unit's comparative trials confirmed what combat was already revealing: the Spitfire IX had restored qualitative parity.
Notable Combat Encounters
Key engagements where these aircraft faced each other in combat
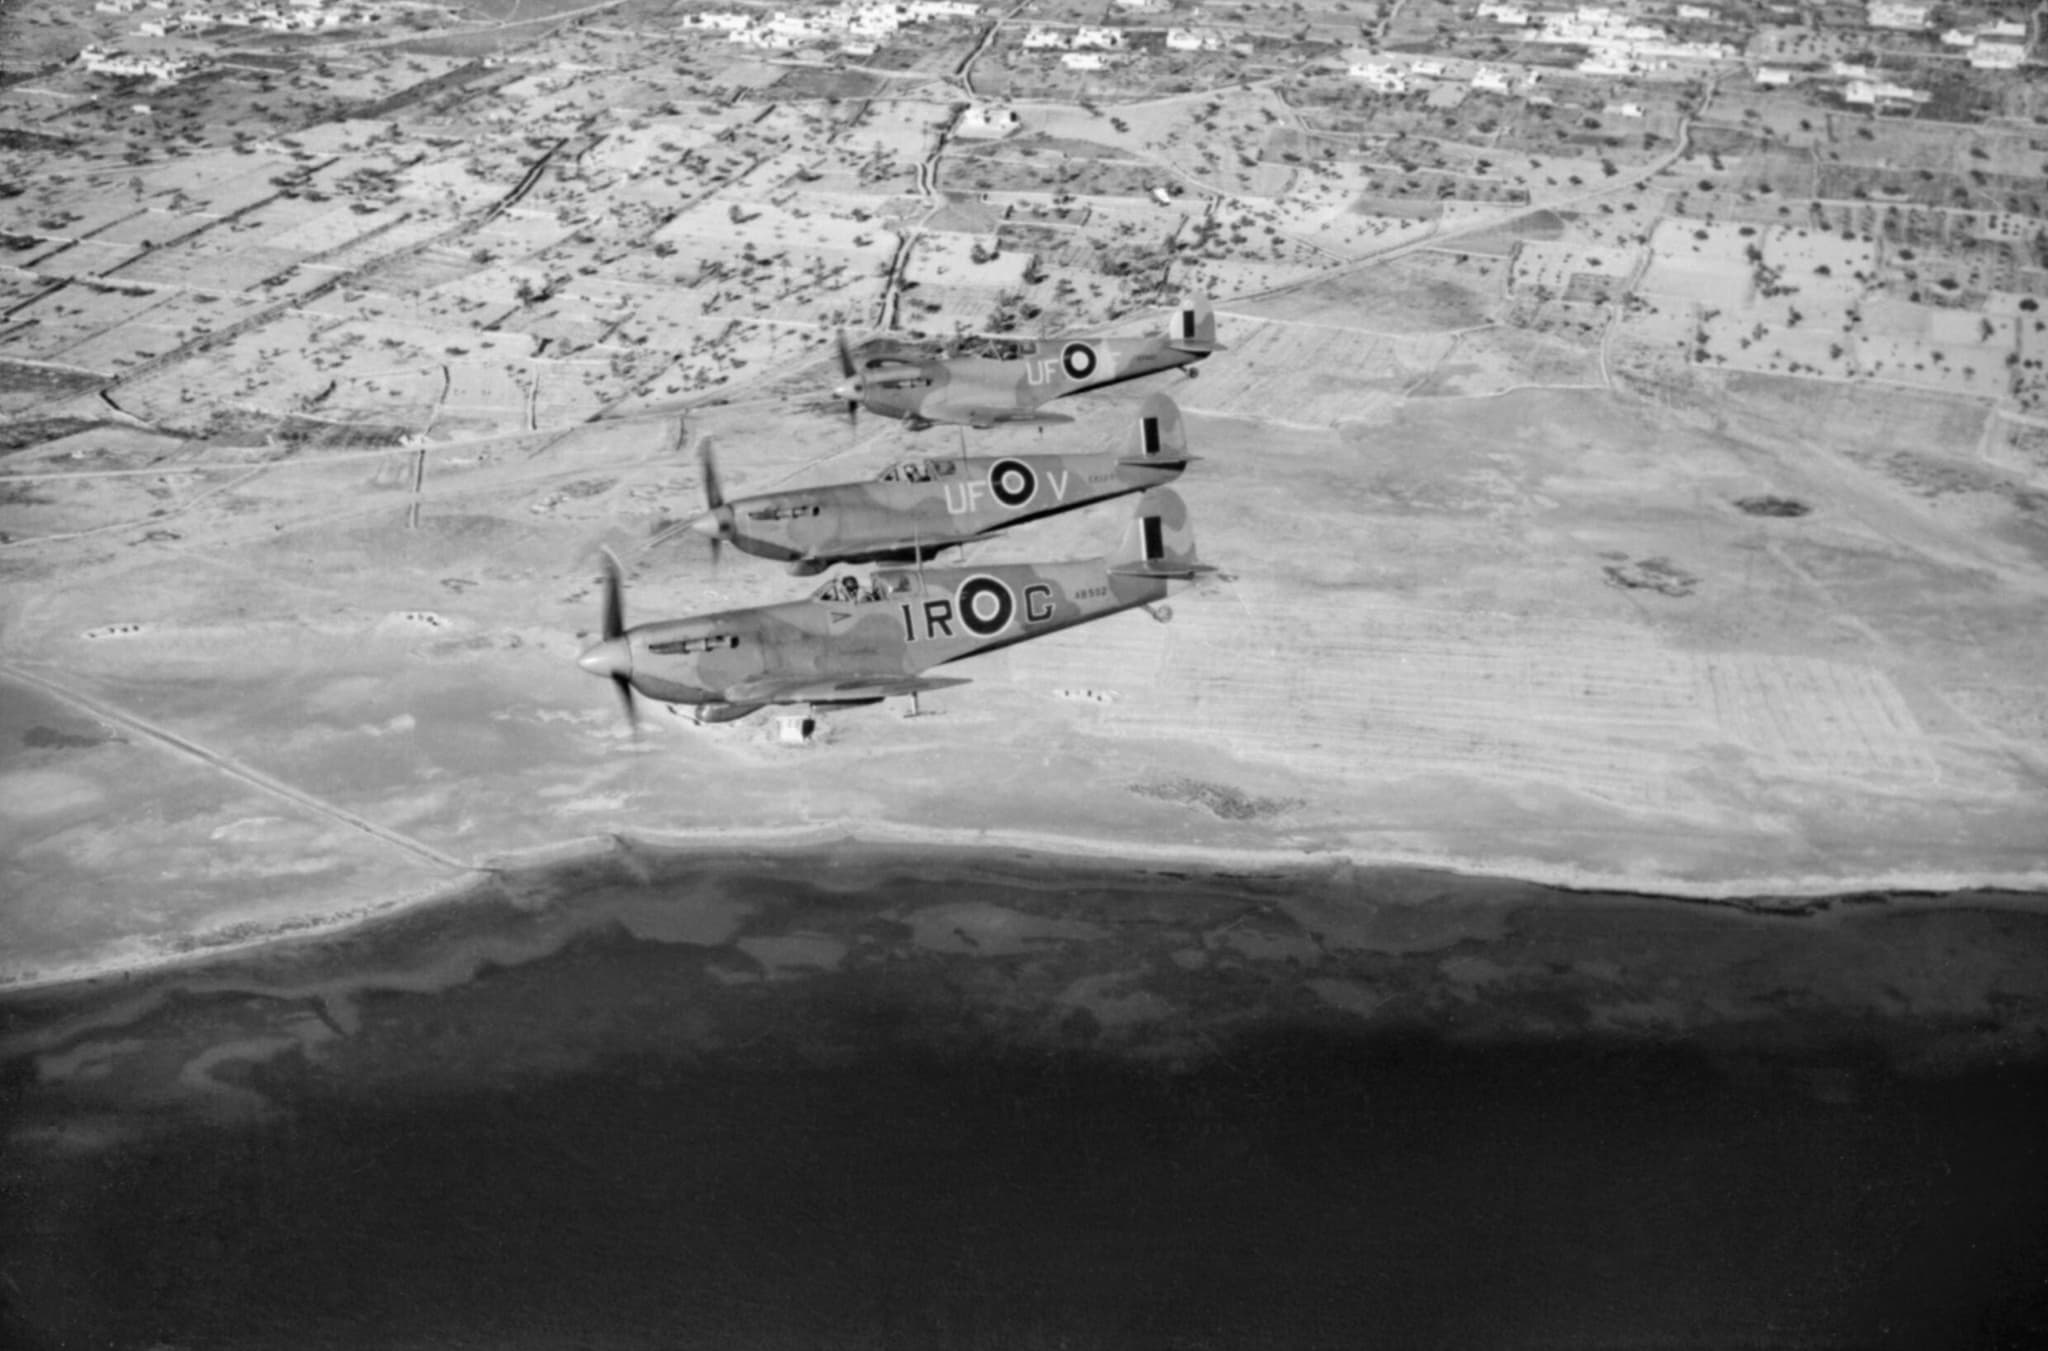
The Dieppe Raid (Operation Jubilee) was the Spitfire IX's operational debut on a large scale. Forty-eight Spitfire squadrons provided air cover, with six squadrons flying the new Mk IX. They faced the Fw 190s of JG 2 "Richthofen" and JG 26 "Schlageter", the two most experienced Channel Front Jagdgeschwader.
Outcome
The Spitfire IX proved decisively superior to the Fw 190A at medium and high altitudes. JG 2 lost 14 Fw 190s and eight pilots killed; JG 26 lost six Fw 190s with their pilots. The RAF lost 106 aircraft total across all types, but the Mk IX squadrons demonstrated they could meet the Fw 190 on equal or better terms.
Dieppe was the turning point that restored qualitative parity over the Channel. For the first time since August 1941, the Fw 190 could no longer dictate the terms of every engagement.
Through the summer of 1943, Spitfire IX-equipped wings conducted offensive sweeps (Ramrods and Circuses) over France to draw the Luftwaffe into combat and wear down its fighter strength. Wing Commander Alan Deere, flying the Spitfire IXB with the Merlin 66 from Biggin Hill, noted the aircraft was "markedly superior in performance to the Fw 190 below 27,000 ft."
Outcome
At its optimum altitude of 21,000 feet, the Spitfire IXB was approximately 30 mph faster, climbed better, and was "vastly more manoeuvrable" than the Fw 190A. The balance of Channel fighter combat shifted decisively toward the RAF, though the Fw 190's superior roll rate and dive speed still made it dangerous.
By mid-1943, the Spitfire IX had become Fighter Command's backbone. The Fw 190A units adapted by avoiding sustained combat and relying increasingly on hit-and-run tactics from energy advantages.
On D-Day, the Luftwaffe was vastly outnumbered, German fighters flew just 760 sorties against 14,000 Allied sorties. JG 26's I and II Gruppen, equipped with Fw 190A-8s, made desperate attempts to interfere with the invasion force. Despite overwhelming odds, JG 26 and JG 2 together claimed 61 of the 106 Allied aircraft lost that day.
Outcome
The Luftwaffe lost 25 Fw 190s on D-Day alone. In the three weeks that followed, 200 Fw 190s and 100 pilots were lost. By the end of June 1944, total losses reached 230 pilots killed and wounded, a rate of attrition that was unsustainable.
Normandy demonstrated that individual aircraft performance was irrelevant against overwhelming numerical superiority. The Fw 190A-8 was still a formidable fighter, but its pilots were increasingly outnumbered, under-trained, and short of fuel.
Operation Bodenplatte was the Luftwaffe's last major offensive, a surprise attack on 17 Allied airfields. Over 1,035 German aircraft participated, roughly split between Fw 190s and Bf 109s. The operation was planned in extreme secrecy, with many pilots only briefed on the morning of the attack.
Outcome
The Luftwaffe lost approximately 250 fighters and 215 pilots (143 killed or missing, 70 captured, 21 wounded), the largest single-day loss in its history. Approximately half of the German aircraft downed were destroyed by their own anti-aircraft fire. JG 2 alone lost its I. Gruppe at a 73% rate and III. Gruppe at 79%.
Bodenplatte effectively destroyed the Luftwaffe's remaining offensive capability. While it damaged Allied airfields, the aircraft losses were replaced within days; the experienced German pilots were irreplaceable.
Armament & Firepower
Primary weapons, munitions capacity, and destructive capability
Spitfire Mk IX Loadout
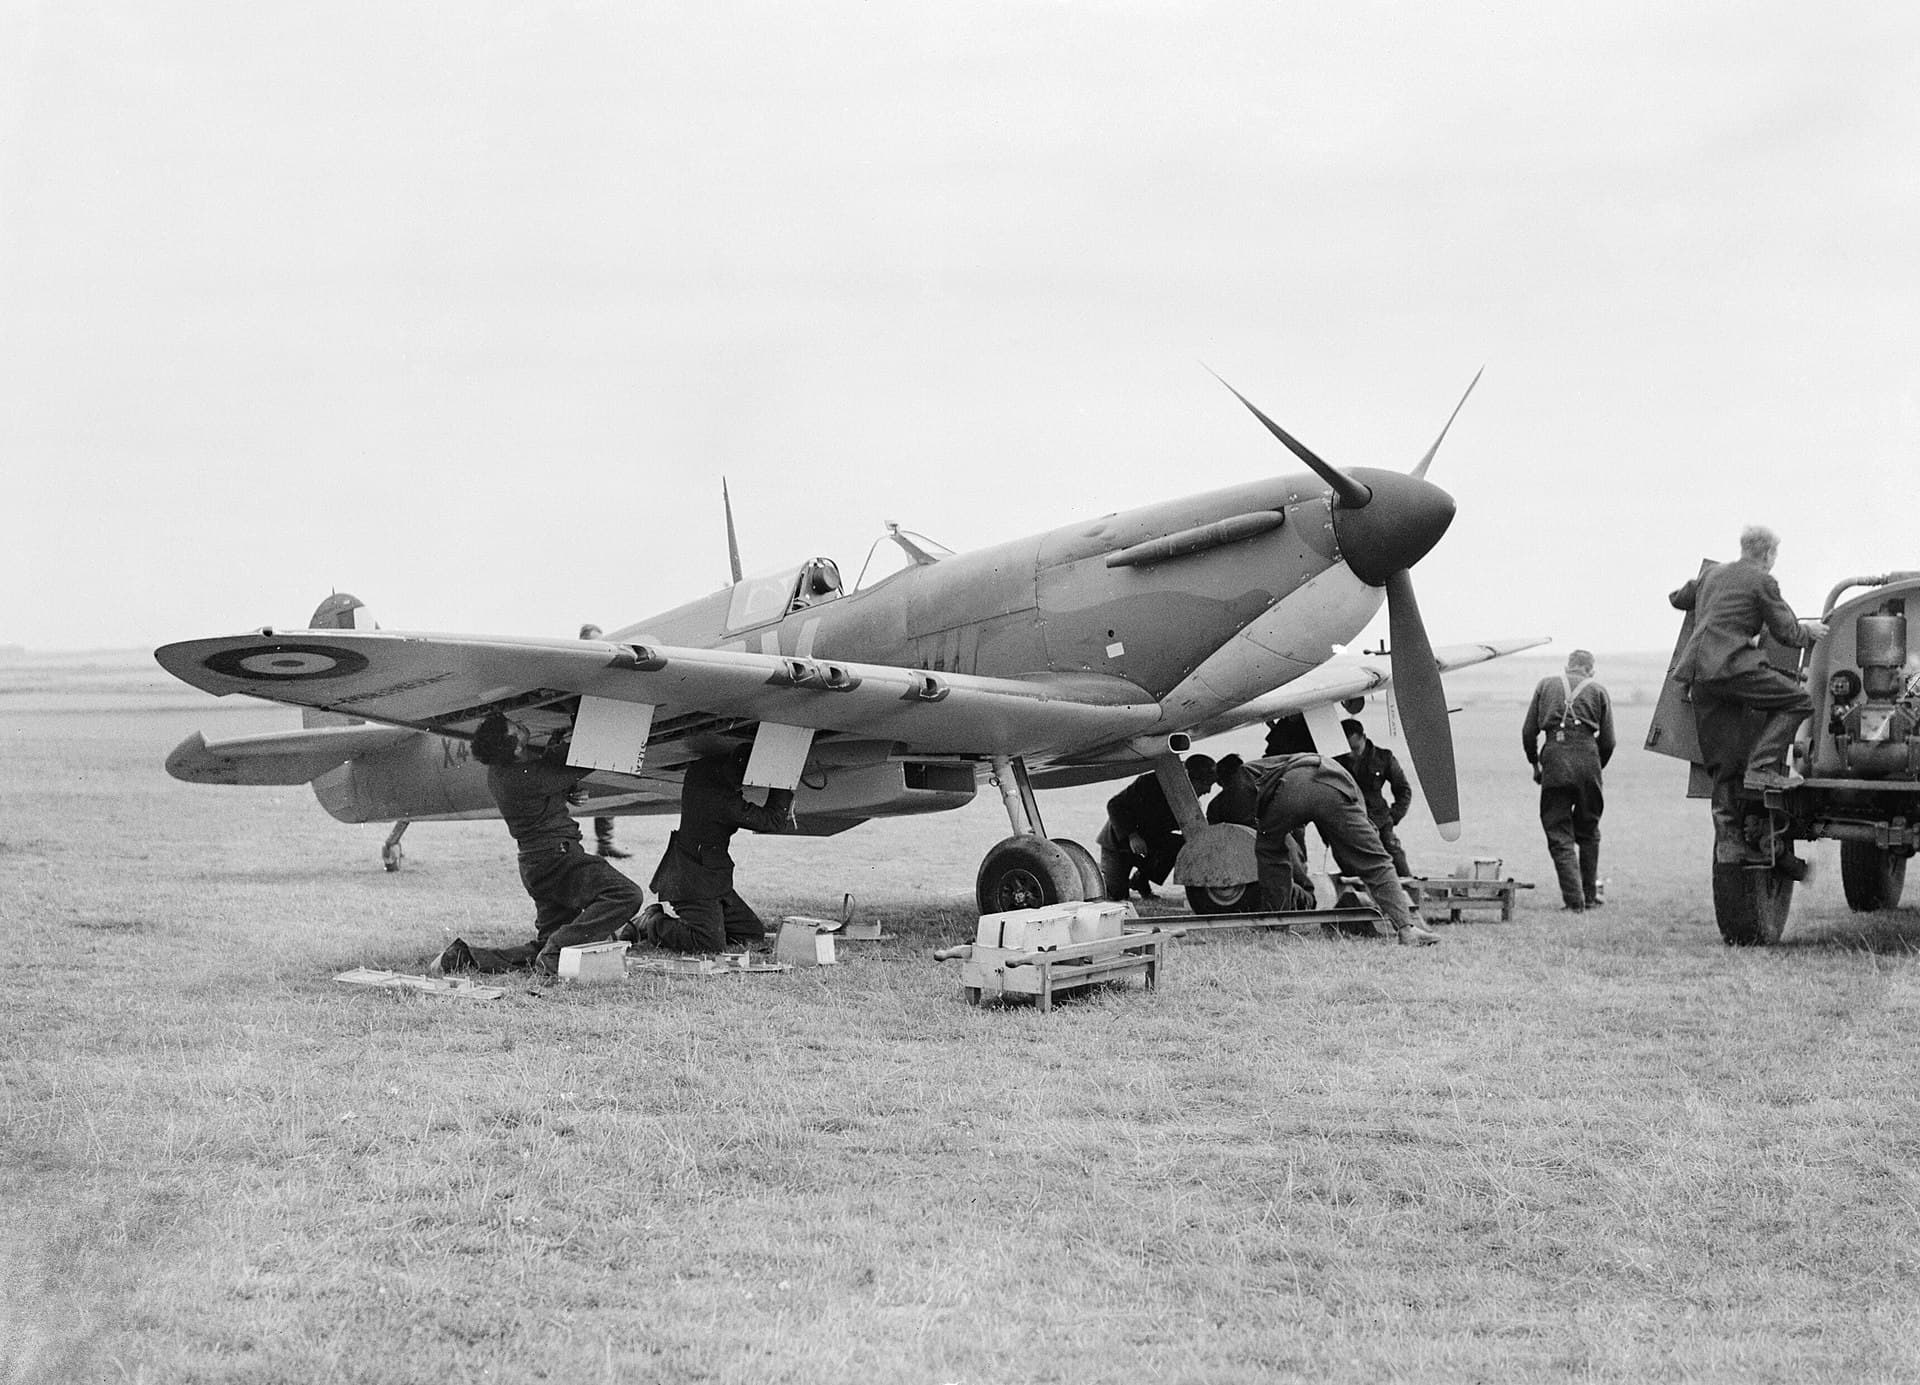
Standard "C" wing: 2x 20mm Hispano Mk II cannons (120 rounds per gun) + 4x .303 Browning machine guns (350 rpg). Later "E" wing: 2x 20mm Hispano + 2x .50 cal Browning M2 (replacing the four .303s). Bomb load up to 1,000 lb (1x 500 lb + 2x 250 lb).
Fw 190A Loadout
Fw 190A-8: 2x 13mm MG 131 machine guns in cowling + 2x 20mm MG 151/20 cannons in wing roots + 2x 20mm MG 151/20 cannons at mid-wing. Total: 4x 20mm cannons + 2x 13mm MGs. Bomb load up to 1,100 lb (500 kg) centerline.
Air-to-Air Verdict
The Fw 190A's four 20mm cannons delivered nearly twice the weight of fire of the Spitfire IX's two Hispanos. Against fighters, the Spitfire's armament was adequate, two cannons were enough to destroy any single-engine aircraft, but the Fw 190A's firepower was overwhelming, particularly effective against heavy bombers.
Ground Attack Verdict
The Fw 190A was the more effective fighter-bomber, with heavier bomb loads, more guns for strafing, and a rugged airframe better suited to low-level operations over hostile territory.
This was one of the Fw 190A's most significant advantages. The sheer volume of 20mm fire from four cannons made it a devastating weapon in both air-to-air and air-to-ground roles. The Spitfire IX's armament was lighter but entirely adequate for its primary role as an air superiority fighter.
Survivability & Protection
Armor, self-sealing tanks, pilot protection, and structural resilience
Spitfire Mk IX Protection
Engine protected by 3mm armor over the glycol header tank from mid-1940. Cockpit armor plate behind and below the pilot. Later marks added Linatex fire-resistant covering and improved self-sealing to fuel tanks.
Fw 190A Protection
Oil tank and oil cooler armor standard from the A-1 model. Armor plating around cockpit and critical components. Designed by Kurt Tank specifically to "absorb a reasonable amount of battle damage and still get back."
Pilot Protection
Both aircraft provided pilot armor, but the Fw 190A's cockpit protection was more comprehensive. The Spitfire's fuel tanks were positioned directly in front of the cockpit, 85 gallons that, if ignited, could send burning fuel into the pilot's face. This was the Spitfire's most dangerous vulnerability.
Structural Durability
The Fw 190A was significantly more rugged. Its air-cooled BMW 801 radial engine could sustain cylinder damage and keep running, there was no coolant system to be disabled by a single bullet. The Spitfire's liquid-cooled Merlin was vulnerable: one hit to the glycol cooling system meant the engine would overheat and seize within minutes.
Crash Survivability
The Fw 190A's wide-track, inward-retracting landing gear (designed for sink rates of 4.5 m/s) gave it far superior ground handling and crash survivability. The Spitfire's narrow-track undercarriage caused frequent ground-loop accidents, and it was poorly suited to rough or unpaved airfields.
The Fw 190A was the clear survivability winner. Its air-cooled engine, heavier armor, rugged construction, and wide undercarriage made it far more likely to bring its pilot home after taking battle damage. The Spitfire was a more delicate machine, faster and more agile, but more fragile when hit.
Tactical Doctrine & Evolution
How pilots were trained to fight in each aircraft and how tactics adapted over time
Spitfire Mk IX Tactics
RAF Spitfire IX squadrons adopted the German-originated finger-four formation by 1941, replacing the outdated vic of three. Spitfire pilots were trained to exploit their turning advantage: the standard defensive maneuver when "bounced" was a hard break turn into the attack, forcing the Fw 190 to either overshoot or pull into a turning fight it would lose.
Offensively, Spitfire wings conducted Rhubarbs (low-level attacks), Circuses (bomber escort to draw fighters), and Ramrods (direct fighter sweeps) over occupied France. The goal was to bring the Fw 190s to combat on terms favorable to the Spitfire, at medium altitude where the Merlin's two-stage supercharger gave it the edge.
A fundamental rule was drilled into every Spitfire pilot: never follow an Fw 190 into a dive or a rolling maneuver. If the Fw 190 dived away, you let it go. If it rolled, you maintained your energy and waited for it to present a tracking solution in your plane of advantage, the turning fight.
Fw 190A Tactics
Luftwaffe Fw 190 tactics centered on energy fighting: boom-and-zoom attacks from a position of altitude and speed advantage. The Schwarm (four-ship) and Rotte (leader-wingman pair) formations provided mutual coverage while allowing aggressive diving attacks.
Against Spitfires, Fw 190 pilots were trained to avoid sustained turning fights at all costs. Their advantages, speed, dive, and roll rate, were best exploited in high-speed slashing attacks followed by zoom climbs back to altitude. If a Spitfire got on their tail, the correct response was a half-roll and dive, using the Fw 190's superior roll rate to reverse direction before the Spitfire could follow.
JG 2 and JG 26 perfected the "bounce", attacking from a position of energy advantage and disengaging before the enemy could effectively respond. Later in the war, as the Luftwaffe was increasingly forced onto the defensive, Fw 190s in Sturmgruppen formations made massed head-on attacks against USAAF heavy bomber formations, leveraging their heavy armament to bring down B-17s and B-24s.
How Tactics Evolved
The tactical evolution of this rivalry followed a clear arc. In 1941–42, the Fw 190A held tactical as well as technical superiority, allowing its pilots to choose when and where to fight. The Spitfire IX's arrival in mid-1942 restored technical parity, but the Luftwaffe's experience and tactical discipline initially maintained an edge.
By 1943, the RAF had adapted its tactics to exploit the Spitfire IX's strengths while mitigating its weaknesses. The finger-four formation, aggressive offensive sweeps, and disciplined energy management made RAF Spitfire wings increasingly effective. The Fw 190 units responded by becoming more selective about when to engage.
The final phase, from D-Day onward, saw tactical considerations overwhelmed by numerical reality. The Luftwaffe was outnumbered, under-fueled, and increasingly flying with poorly trained replacement pilots. Even the best tactics cannot overcome a 20:1 numerical disadvantage. The Fw 190A remained a dangerous opponent in individual combat, but the strategic battle was lost.
What the Pilots Said
Firsthand accounts from the men who flew and fought these aircraft
On the Fw 190A“It was superior to the Me 109F and completely outclassed our Spitfire Vs. The new aircraft seemed faster in a zoom climb than the Me 109 and far more stable in a vertical dive. We could out-turn it, but you couldn't turn all day. As the number of 190s increased, so the depth of our penetrations decreased. They drove us back to the coast.”
On the Spitfire Mk IX“At 21,000 feet, the Spitfire IXB was approximately 30 mph faster, was better in the climb, and vastly more manoeuvrable than the Fw 190.”
On the Fw 190A“The Messerschmitt 109 and the British Spitfire, the two fastest fighters in the world at the time we began work on the Fw 190, could both be summed up as a very large engine on the front of the smallest possible airframe; in each case armament had been added almost as an afterthought. I wanted a quite different breed of fighter, one that could operate from ill-prepared front-line airfields, be flown and maintained by men who had received only short training, and absorb a reasonable amount of battle damage and still get back.”
On the Spitfire Mk IX“The Spitfire IX compared favourably with the Fw 190 provided the Spitfire had the initiative.”
By the Numbers
Statistical combat performance and historical kill ratios
Precise kill ratios between specifically the Spitfire IX and Fw 190A are difficult to isolate from broader statistics, as the RAF and Luftwaffe categorized losses by squadron rather than by specific aircraft-on-aircraft engagements. However, the trajectory of the air war tells the story clearly.
Before the Spitfire IX arrived, the Fw 190A dominated. From August 1941 through mid-1942, the Fw 190-equipped JG 2 and JG 26 inflicted punishing losses on Spitfire V-equipped RAF wings during cross-Channel operations, while suffering relatively light casualties in return.
The Spitfire IX's introduction at Dieppe in August 1942 marked the inflection point. JG 2 lost 14 Fw 190s and eight pilots; JG 26 lost six Fw 190s. While the overall Dieppe operation was a disaster, the air battle demonstrated that the Fw 190A's reign of supremacy was over.
By D-Day, the situation had reversed completely. On 6 June 1944, German fighters flew just 760 sorties against 14,000 Allied sorties. JG 26 and JG 2 together claimed 61 Allied aircraft while losing 25 Fw 190s, impressive combat performance, but unsustainable attrition. In three weeks, 200 Fw 190s and 100 pilots were lost.
Operation Bodenplatte on 1 January 1945 was the final catastrophe: 250 Luftwaffe fighters destroyed and 215 pilots lost in a single day, with approximately half of German losses caused by friendly anti-aircraft fire. The Western Front Jagdgruppen never recovered.
The overall trend from 1942 to 1945 moved inexorably in the Spitfire's favor, but this reflected declining German pilot quality, fuel shortages, and overwhelming Allied numbers as much as any aircraft performance differential. When equally skilled pilots met in equally maintained aircraft, the matchup was genuinely close to even.
Production & the Numbers Game
How industrial output shaped the strategic balance
5,665
Spitfire Mk IX Built
13,367
Fw 190A Built
The production numbers reflect the different roles these aircraft played. The Spitfire IX was primarily an air superiority fighter, virtually all 5,656 were built for that mission. The Fw 190A served as day fighter, night fighter, fighter-bomber, and dedicated ground-attack platform, requiring far higher production numbers to fill all those roles across the Eastern Front, Western Front, Mediterranean, and Defense of the Reich.
The Spitfire IX was originally intended as a stopgap until the purpose-built Mk VIII arrived, but it proved so effective that it became Fighter Command's backbone. This is perhaps the greatest vindication of the design: a hasty adaptation of an existing airframe, produced in enormous numbers, outperformed the aircraft it was meant to merely hold the line against.
Germany's total Fw 190 production exceeded Spitfire IX production by nearly 4:1, but this reflects the type's versatility rather than fighter-for-fighter production parity. In the pure fighter role over the Channel Front, the numbers were much closer.
Advantages in This Matchup
Where each aircraft holds the edge in a head-to-head encounter
Spitfire Mk IX Spitfire
- Decisive speed and climb advantage at 15,000–27,000 ft, the most common combat altitude band
- Tighter turning circle at all speeds, could always get inside the Fw 190 in a sustained turn
- Superior high-altitude performance above 22,000 ft where the Merlin's two-stage supercharger dominated
- Excellent rate of climb, 4,530 ft/min vs 3,350 ft/min gave energy advantages in extended combat
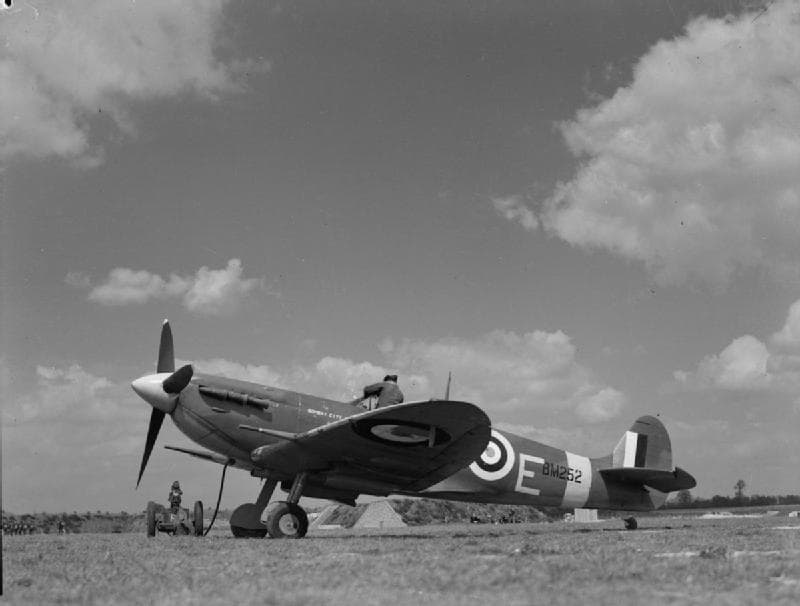
- Outstanding handling qualities, one of the most pleasant fighters of the war to fly
- Proven air superiority record, restored Allied air dominance after the Fw 190 crisis of 1941–42
- Successful stopgap that became a standard, the Mk IX outlasted the purpose-built Mk VIII it was meant to bridge to
Fw 190A Wurger
- Superior roll rate, one of the best of any WW2 fighter, enabling evasive maneuvers the Spitfire couldn't follow
- Devastating firepower, four 20mm cannons plus two 13mm MGs outgunned the Spitfire's two-cannon armament
- Air-cooled BMW 801 radial engine, no coolant system to be disabled by a single bullet
- Rugged construction designed to absorb battle damage and keep fighting
- Wide-track undercarriage, superior ground handling and rough-field capability
- Better range and endurance, approximately 500 miles vs 434 miles
- Extraordinary versatility, effective as day fighter, night fighter, fighter-bomber, and ground-attack platform
Final Verdict
Overall Assessment
Context-Dependent
Neither aircraft holds a definitive advantage, the winner depends on the scenario.
The Spitfire Mk IX and Fw 190A were the most evenly matched fighter rivals of the Second World War. Neither aircraft held a clear overall advantage, their strengths and weaknesses were complementary opposites. The Spitfire excelled where the Fw 190 was weak (high altitude, turning fights, sustained climb), and the Fw 190 excelled where the Spitfire was vulnerable (firepower, survivability, dive speed, roll rate, rough-field operations).
In the pure air superiority role where they most often met over the Channel and Western Europe, the Spitfire IX held a slight edge at the altitudes that mattered most (15,000–27,000 ft). This edge was enough to deny the Fw 190A the dominance it had enjoyed over the Spitfire V, and denying that dominance was exactly what the Mk IX was designed to do.
But evaluating these aircraft purely on performance specifications misses the larger point. The Fw 190A was a far more versatile design that served effectively in half a dozen roles; the Spitfire IX was primarily an air superiority fighter. The Fw 190A could operate from a muddy field; the Spitfire needed a proper runway. The Fw 190A could absorb punishment that would have destroyed the Spitfire; the Spitfire could outfight the Fw 190A in the vertical plane.
The ultimate answer to "which was better?" is that each was better at what it was designed to do. The Spitfire IX was the superior dogfighter. The Fw 190A was the superior operational platform. The air war was decided not by which aircraft was better, but by which side had more of them, better-trained pilots to fly them, and fuel to keep them in the air. By 1944, the Allies had decisive advantages in all three.
Theaters of Operation
Shared Theaters
Spitfire Mk IX Only
Fw 190A Only
Related Matchups
 Spitfire Mk IX
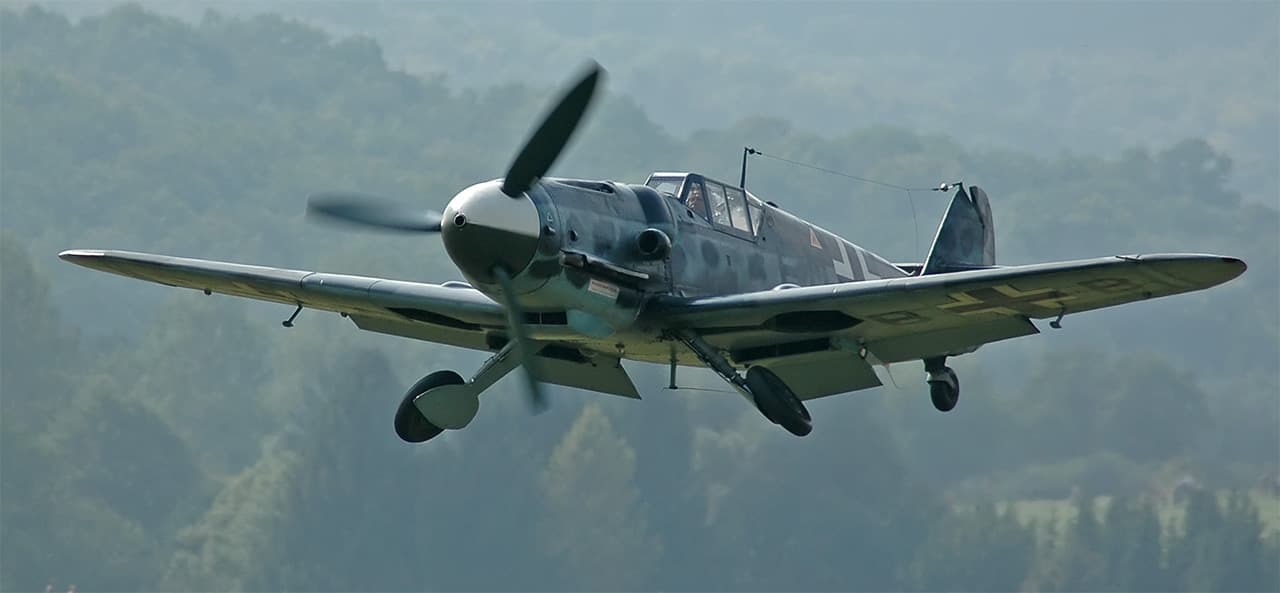 Bf 109G
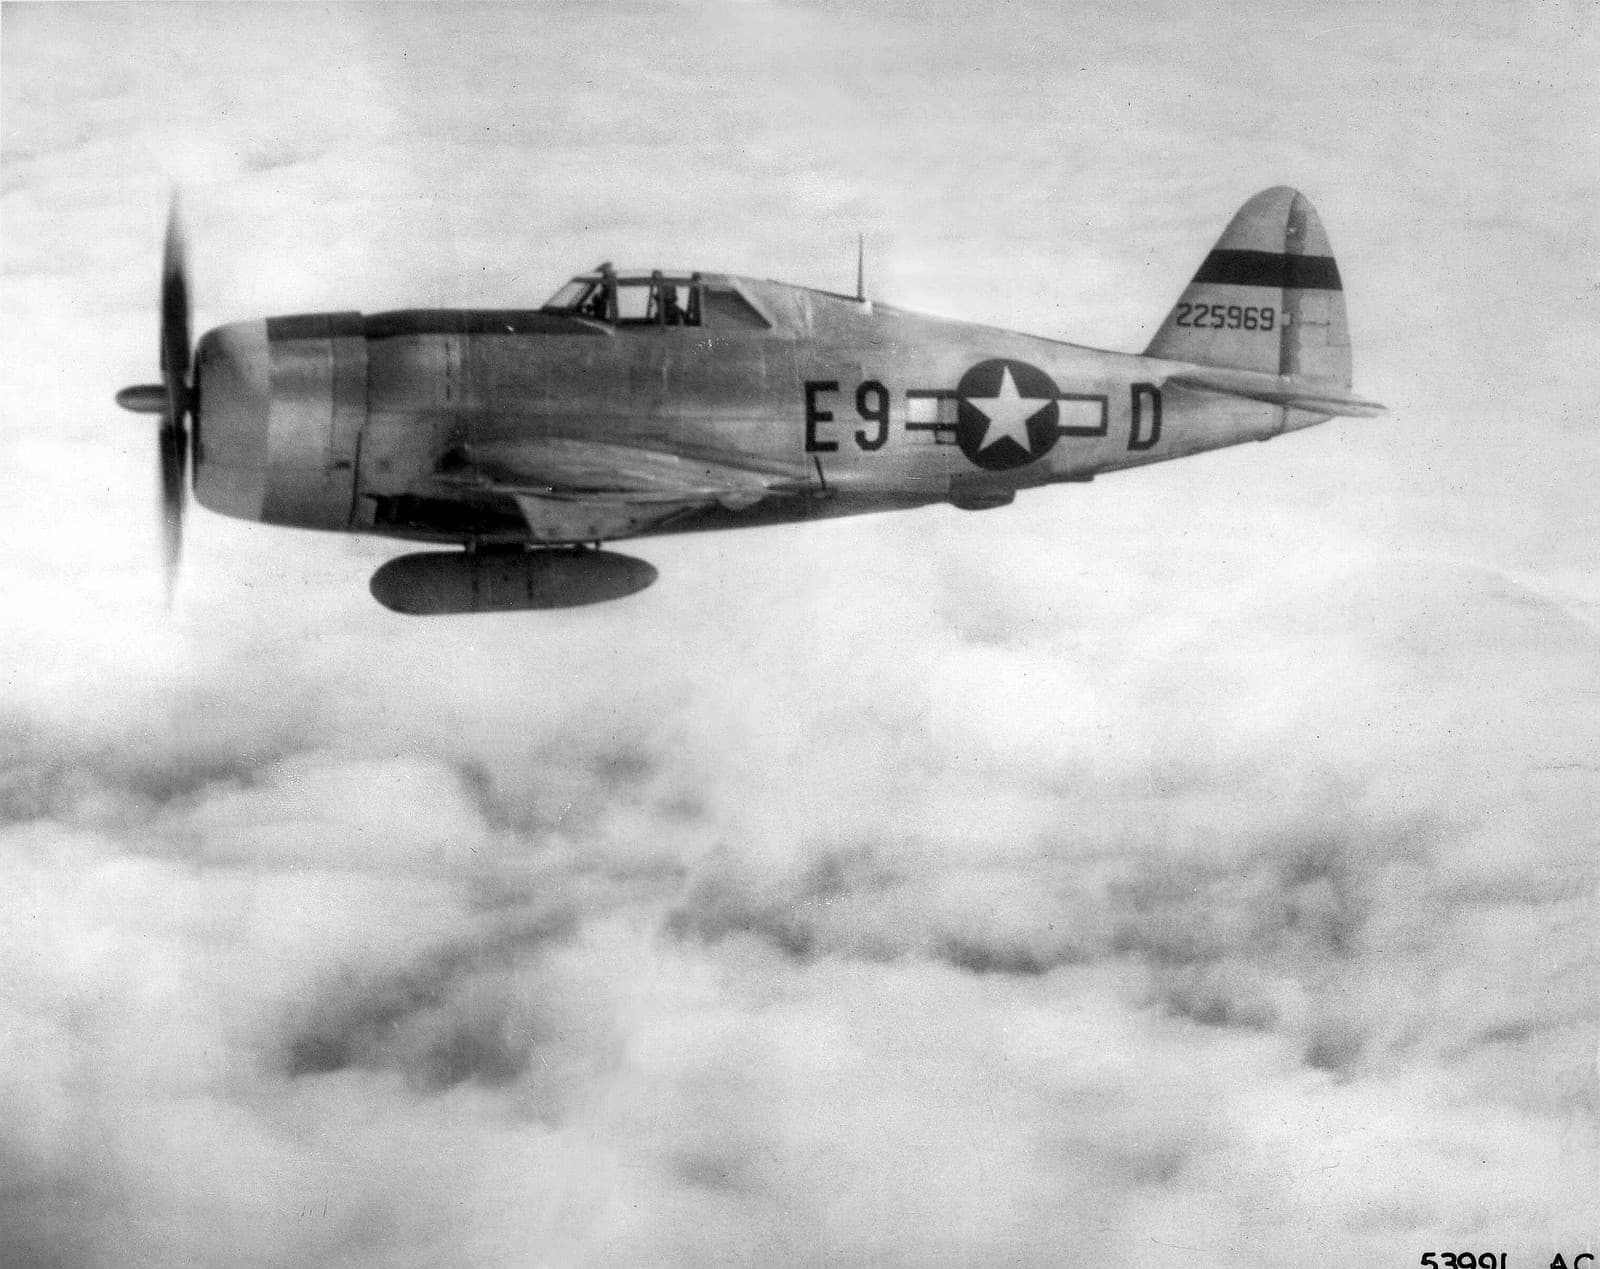 P-47D
P-47D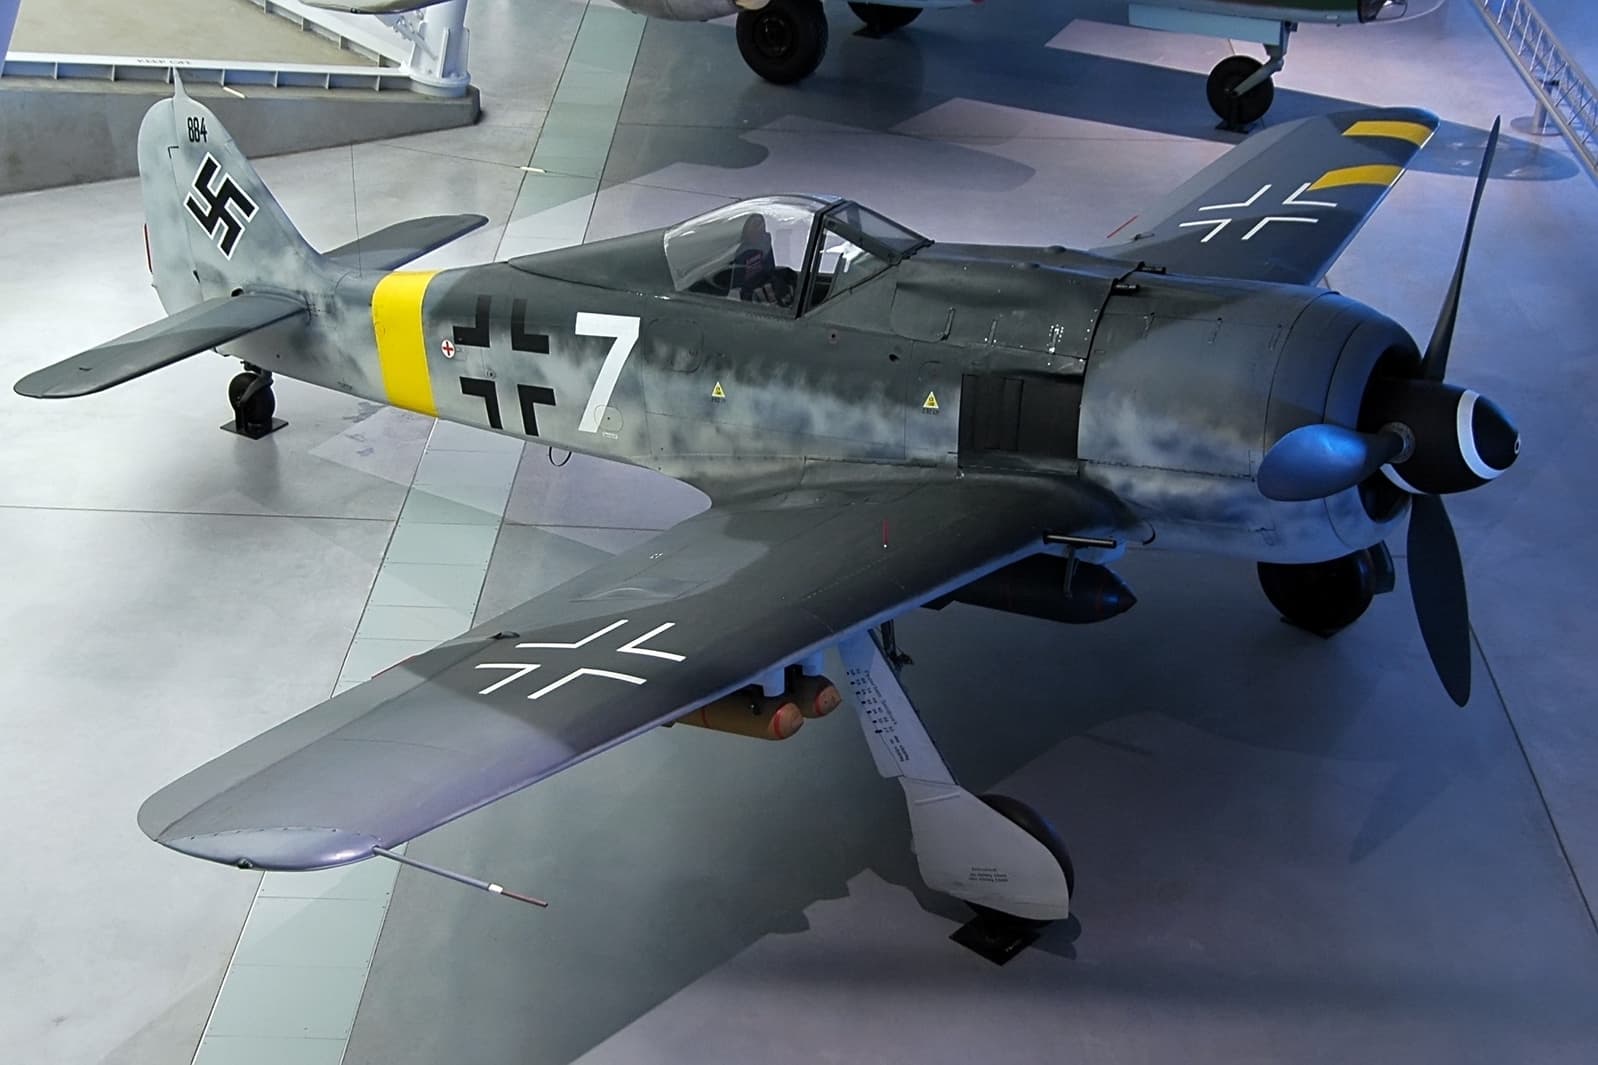 Fw 190A
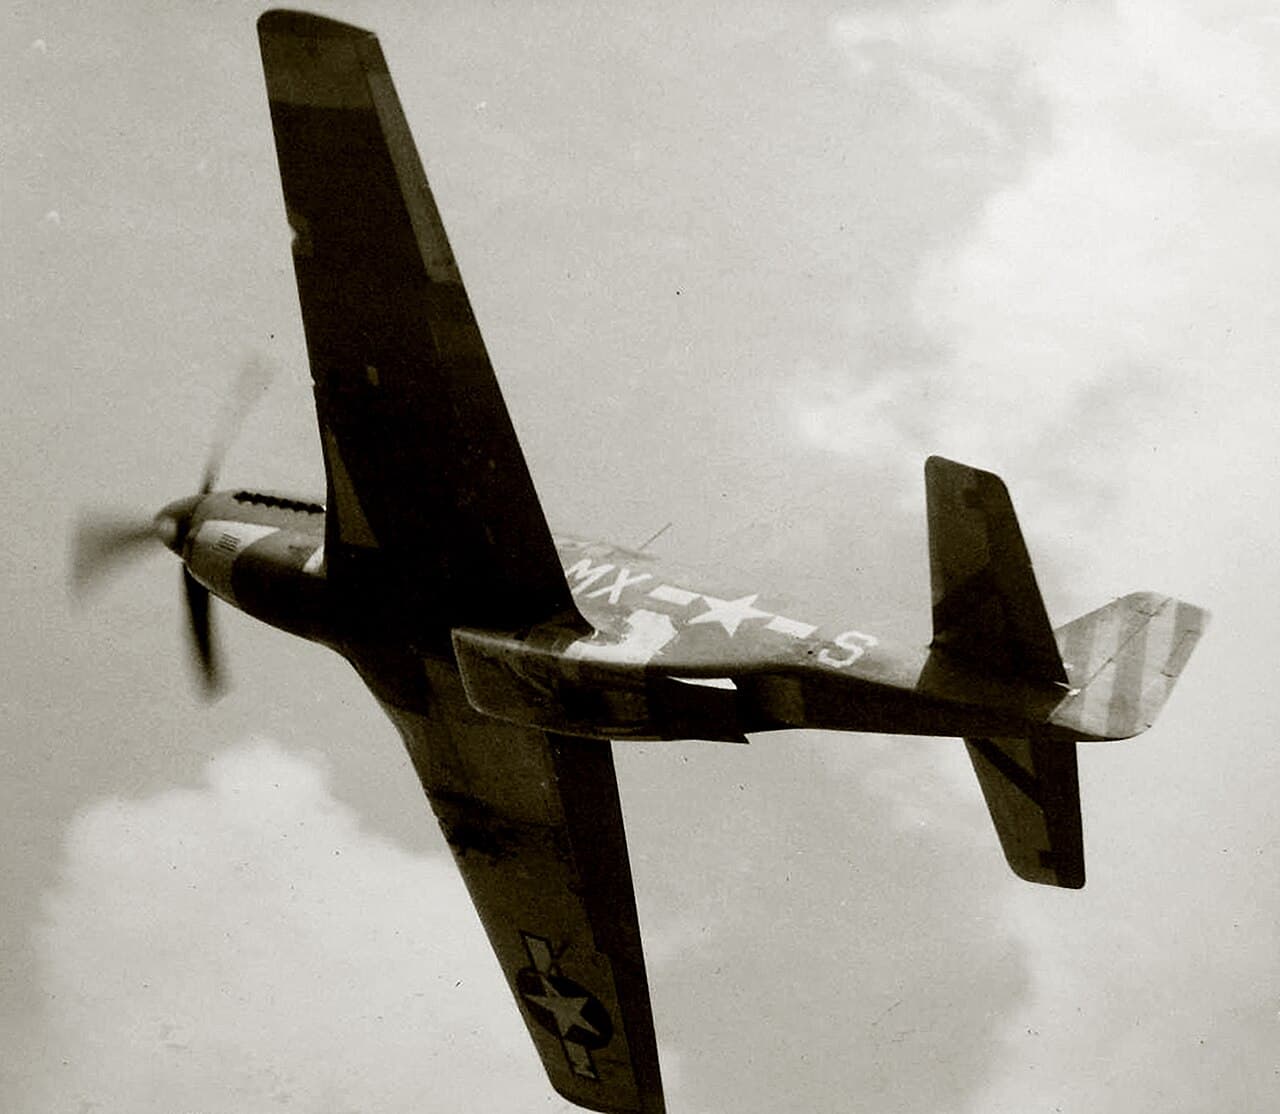 P-51DSpitfire Mk IXSpitfire Mk IX
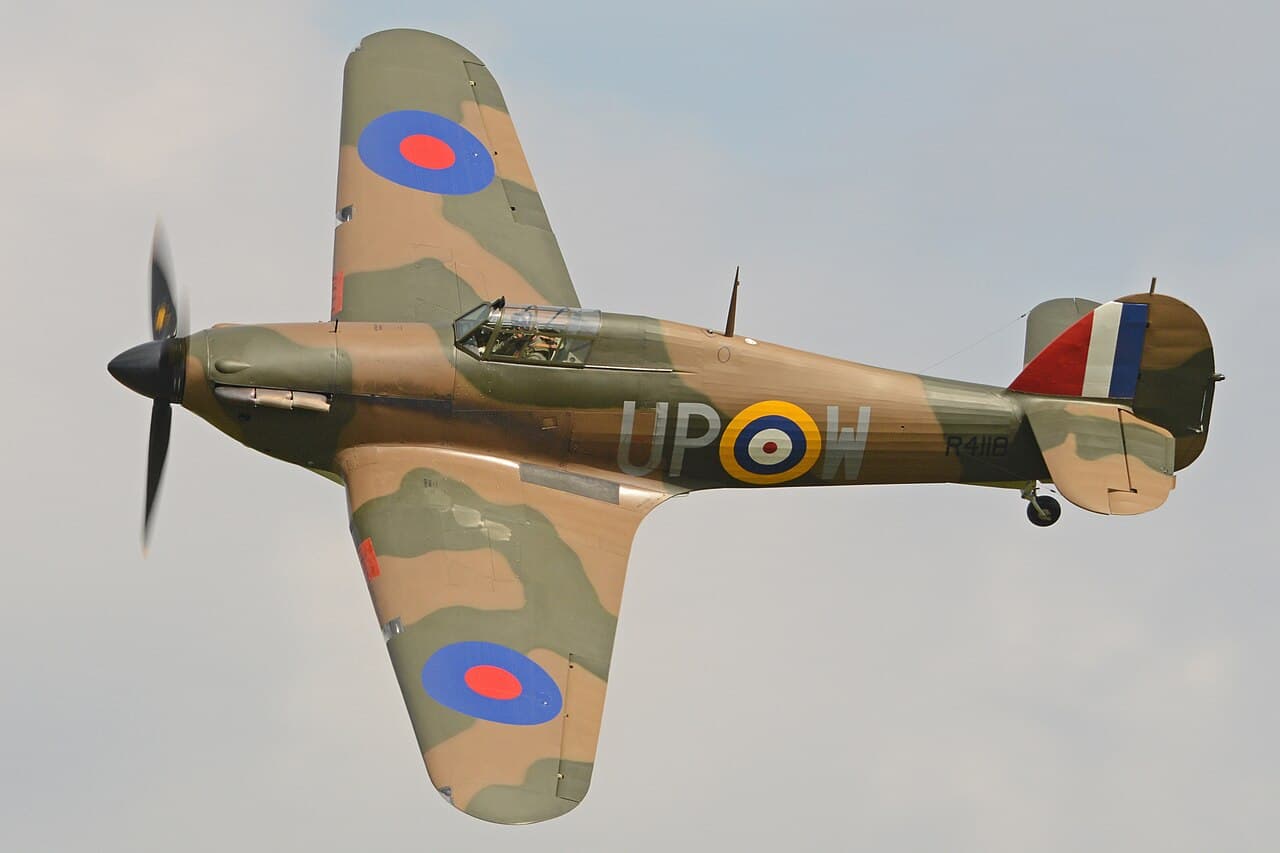 Hurricane Mk IICP-51DSpitfire Mk IXP-51DFw 190ABf 109GFw 190A